
DinoCapture 2.0 for Windows
Installation
As long as you have administrator privileges, you can perform the installation.
Active firewall or antivirus software may prevent DinoCapture 2.0 from installing properly. Try to turn off your firewall or antivirus software temporarily when you install DinoCapture 2.0. Remember to turn your firewall or antivirus software back on when you have completed the DinoCapture 2.0 installation.
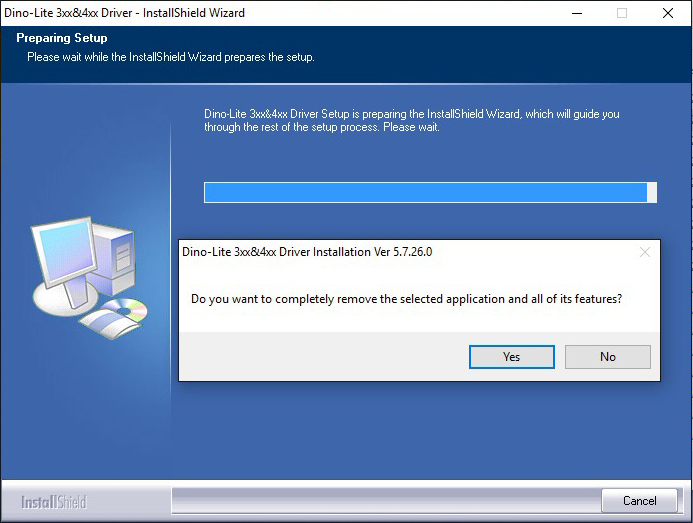
For Dino-Lite AM211, AM310, AM311 series, Dino-Lite Plus series (AM3XX), and Dino-Lite Pro series (model number AM4XX/AD4XX/AMH), specific driver is needed to operate the device.
It is most likely that you have ever installed the driver. Please click No if you do not intend to remove the driver when you see the following message.
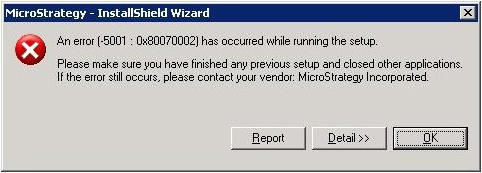
Since some of the Dino-Lite drivers are not digitally signed, Windows 8 and Windows 10 are not able to load the driver with its default setting. To resolve the error, you will need to disable the driver signature enforcement.
To disable the driver signature, please follow the Driver Installation for Windows 8 or Driver Installation for Windows 10.
Troubleshooting
If the following message appears while you are opening DinoCapture 2.0, please try the following solutions.
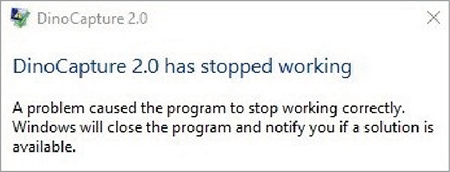
a. Install the latest version of DinoCapture 2.0.
If the problem persists, please
b. Press Ctrl + Shift and double-click on the DinoCapture 2.0 shortcut to reinitialize the software.
If the software still not working, please try to
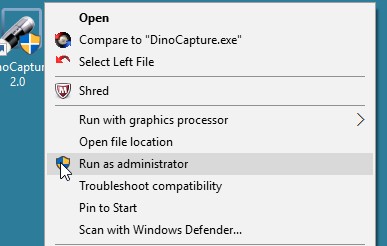
c. Right-click over the DinoCapture 2.0 shortcut, and click Run as Administrator.
If none of the above solutions solve the problem, please contact us or your local distributor for further assistance.
Press Ctrl + Shift + Esc to open the Windows Task Manager, then select the Processes tab. Look for and click DinoCapture.exe, and then select End Process.
The default position of the DinoCapture 2.0 preview screen is set as undocked. There is a possibility that the preview window had been moved off-screen unintentionally when you used the software last time.
To get the preview window back on screen, you will need to change the default setting of DinoCapture 2.0 by following the below steps:
1. Close DinoCapture 2.0 if it is currently open.
2. Select Start Menu > Documents, and open the Digital Microscope folder > Setting folder.
3. Open the file DC20.ini in a text editor.
4. Change the line from “Save_Preview_Window_Position=on” to “Save_Preview_Window_Position=off”.
5. Save the changed file, and reopen DinoCapture 2.0.
A possible reason is that the digital microscope may be interfering with your PC’s webcam. Try to disable the webcam temporarily.
This issue may occur when the USB bandwidth is not enough for the USB devices. To cope with the limitations of USB technology, there are two quick solutions:
a. Lower one of your microscope’s resolutions.
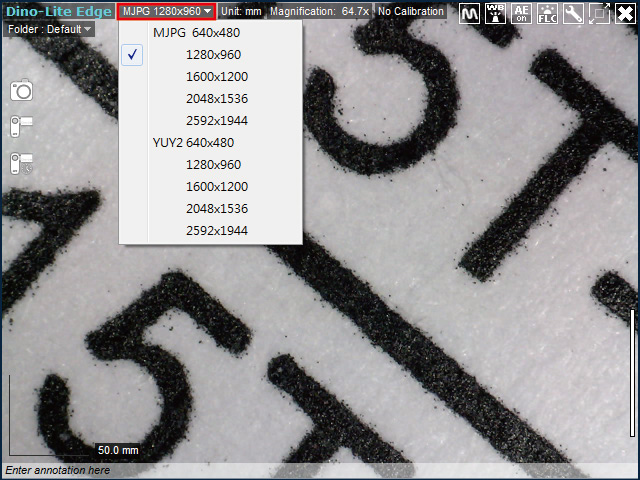
b. Connect your USB camera to a different USB hub.
The auto-update functionality could only be worked under the administrator mode. Right-click over the DinoCapture 2.0 shortcut, and click Run as Administrator.

Reinstall the DinoCapture 2.0 software.
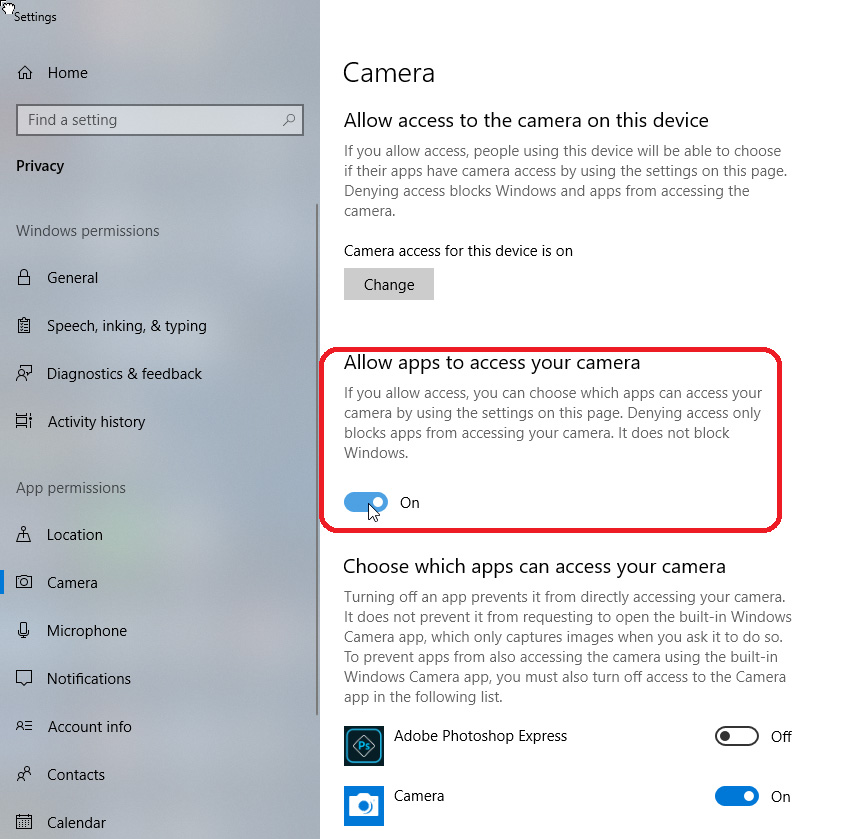
The Windows 10 April 2018 update (Build 1803) introduced a Microphone and Webcam privacy settings option that blocks unauthorized applications from turning on your devices without your permission.
Dino-Lite cameras and DinoCapture software were affected by this change, to resolve issues where DinoCapture can no longer see your Dino-Lite microscope please follow the directions below:
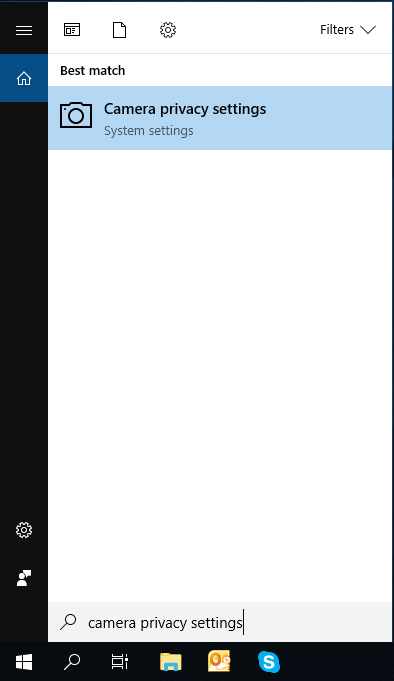
1. Search Camera Privacy Settings and click to open from the search list.
2. Change the toggle to On for the camera accessing this device.
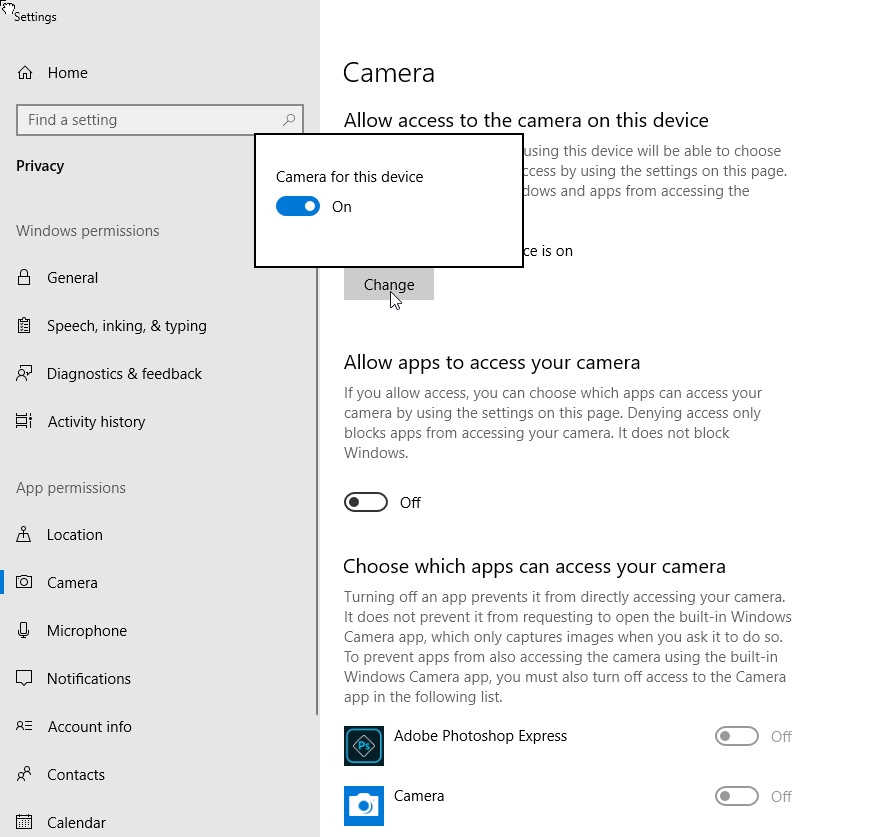
3. Change the toggle to On to allow apps to access your camera.
Measurement
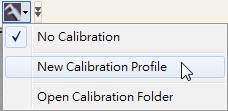
1. On the toolbar click on the Calibration icon ![]() and a drop-down menu will appear.
and a drop-down menu will appear.
2. Select “New Calibration Profile”.
3. A small window will pop up. Give the profile a name. For example, if you are calibrating at 200X and measuring 1mm, the profile name could be “200X – 1mm”.
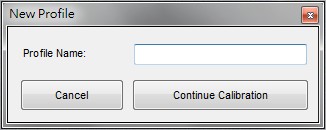
4. Click “Continue Calibration” when finished naming the profile.
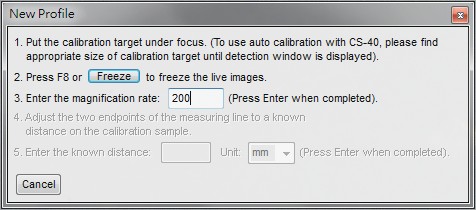
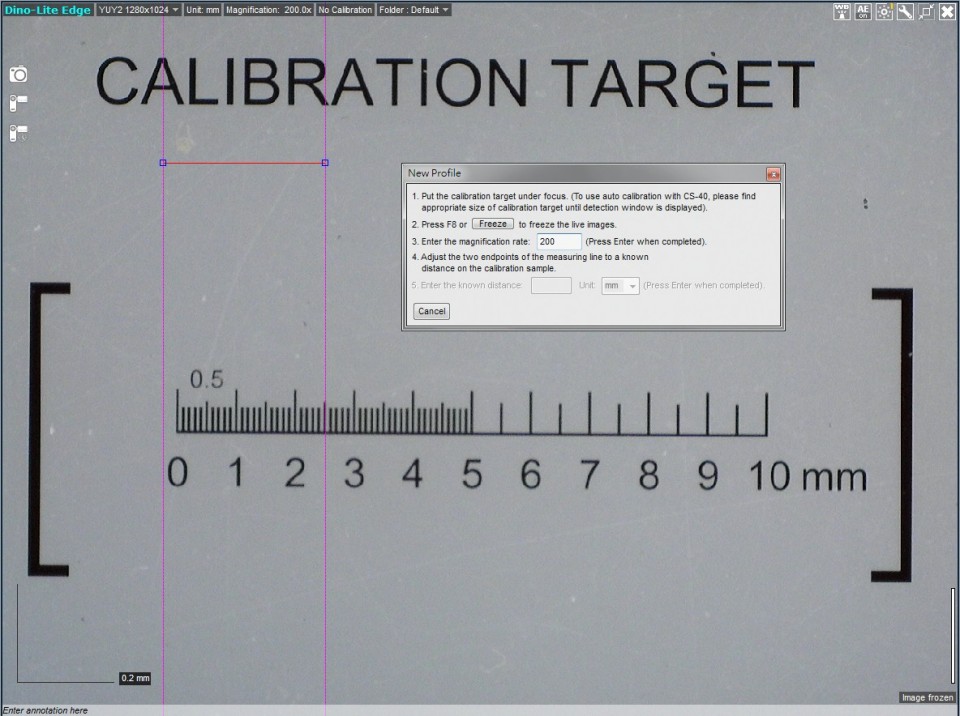
5. In the new menu press F8 on the keyboard or click the “Freeze” button to freeze the calibration object.
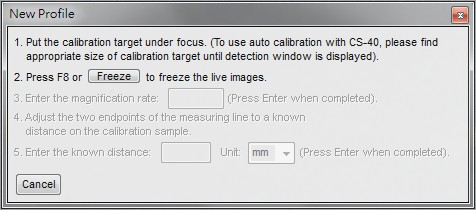
6. Enter the magnification that can be read from the Dino‐Lite. Press Enter when finished. In this example, I will be calibrating at 200X.
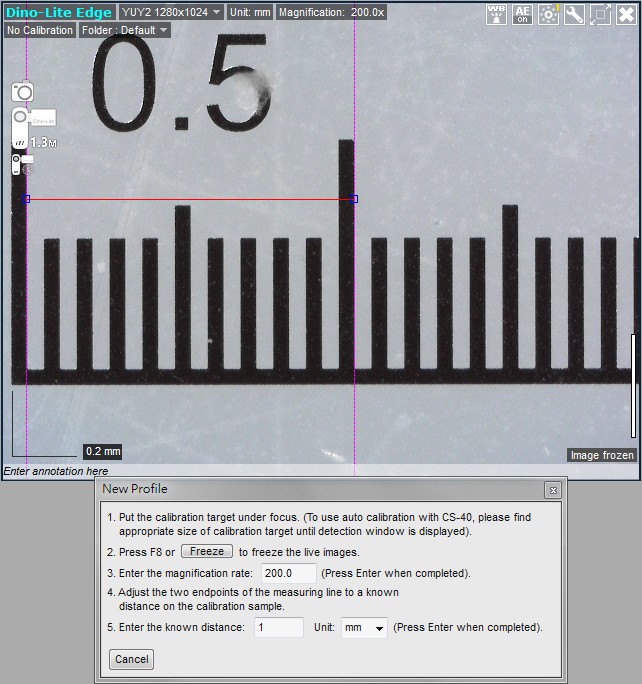
7. A red bar with two blue dots will appear with pink guidance lines. You are now ready to calibrate.
8. Click once on one of the blue dots to start moving it to your desired location.
9. Click again to stop.
10. Click on the other blue dot to start setting the other endpoint.
11. Click on the left mouse button again to stop.
*Tip: For more accurate measurements, click on the magnify icon ![]() . While using the magnify feature, you can use the arrow keys on your keyboard for pixel-per-pixel vertical or horizontal movement. When set to a desired location, click the left mouse button to set the desired endpoint.
. While using the magnify feature, you can use the arrow keys on your keyboard for pixel-per-pixel vertical or horizontal movement. When set to a desired location, click the left mouse button to set the desired endpoint.
12. When the correct distance is measured, enter the known distance. In this example, I am measuring a 1mm calibration target so I entered 1 into the known distance box.
13. Enter the units of measurement by selecting the “Unit” dropdown box.
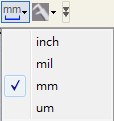
Press “Enter” to complete the setup.
You are now finished setting up a new calibration profile.
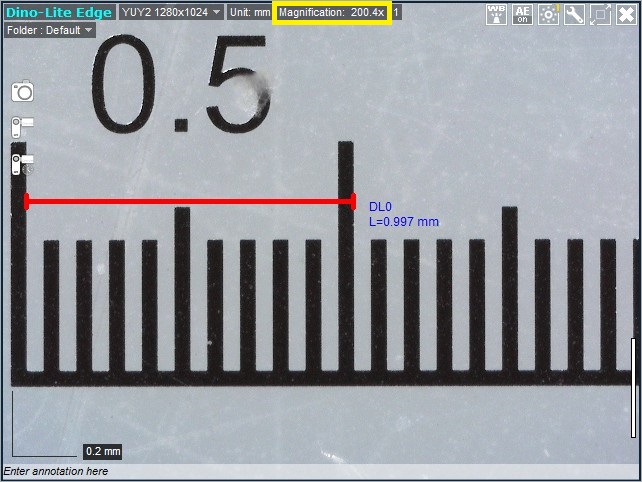
When a calibration profile is selected, it will show in the live video window next to the adjusted magnification.
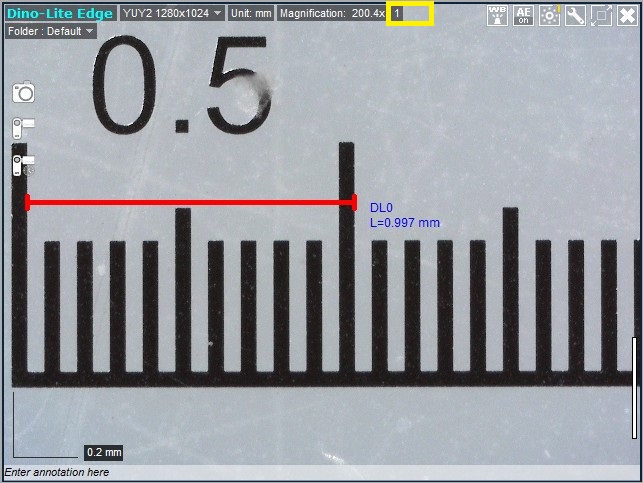
When a calibration profile is in use, a box on the top of the preview window will display your adjusted magnification rate.
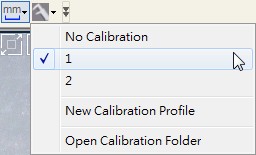
If you create multiple calibration profiles for different magnification levels, i.e., 1 and 2, they will appear in the Calibration drop-down menu. A check mark will appear next to the profile you have selected.
For best results, it is recommended that you select a calibration profile close to the magnification you are using. For example, if the microscope is at 75X magnification and you have calibration profiles set for 50x, 80x, and 200x, it is best to use the profile setup at the closest magnification, which in this case would be 80x.
If you measure with a magnification out of the calibrated range of your profile, the results may not be accurate. For example, if you calibrate at around 50x but then measure at 200x magnification, the measurement results may be inaccurate.
If fixed magnification is required, simply calibrate at that magnification only for the most accurate results. For example, if you will be using a fixed magnification of 50x, setting up a single calibration profile at 50x will give you the most accurate results.
The calibration can be disabled at any time by selecting No Calibration in the drop-down menu.

Note: The measurement and calibration feature is only available for certain models. Please contact a local sales representative for further information.
Introduction
With the EdgePLUS AM4917 and Edge 3.0 AM73915 series, Dino-Lite has taken its Depth Acquisition (DPQ) capability and accuracy to the next level. In contrast to previous models that obtained depths from EDOF stacked images, the AM4917 and AM73915 series’ delicate focus adjustment acquires more accurate depths from the minute increments of change in focus.
(Acquire depths of grooves, holes, and other types of topographical variations with EdgePLUS AM4917 series.)
Requirements
The DPQ functionality applies to Dino-Lite EdgePLUS AM4917MZT, AM4917MZTL, and Edge 3.0 AM73915MZT(R10) and AM73915MZTL(R10A). Also, please make sure to have DinoCapture 2.0 ver. 1.5.39 or later version installed. If you need to update DinoCapture 2.0, click here and download the latest version.
How to acquire depths
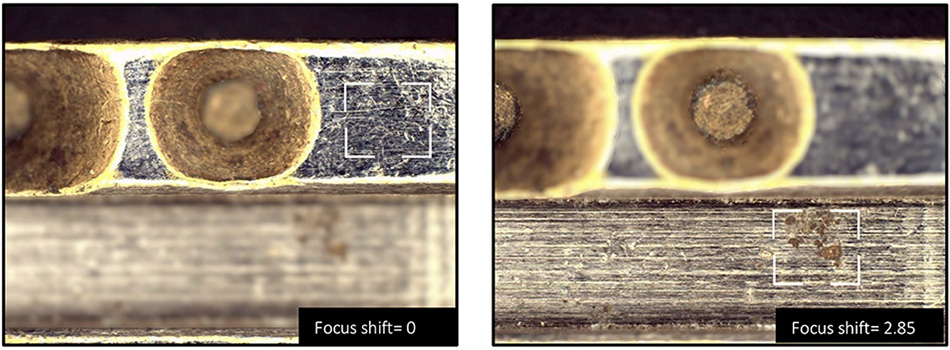
1. Adjust the focus to a plane of interest. This position will be considered the reference plane as 0.
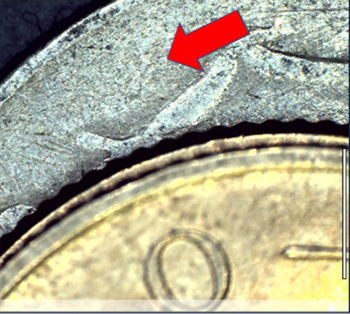
2. To acquire depths, readjust the focus by:
Middle-clicking on a point of interest to autofocus; if necessary, scroll the mouse wheel to readjust the focus.
Or
Press the “Ctrl” key and scroll the mouse wheel to change focus manually.
![]() or “Ctrl” +
or “Ctrl” + ![]()
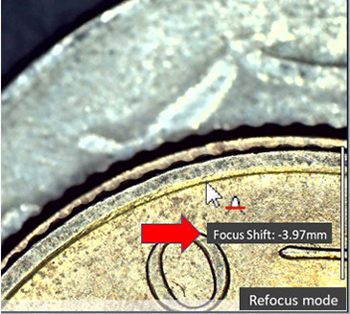
(This cursor [![]() ] indicates that refocus mode is active and that the focus can be readjusted.
] indicates that refocus mode is active and that the focus can be readjusted.
A positive focus shift refers to a plane below the reference plane.)
3. To exit Refocus mode, left-click anywhere on the preview window or press the “ESC” key.
![]()
Depth Acquisition maximum depth range and accuracy
When performing DPQ, its maximum depth range and tolerance are determined by the magnification being used. This section shows the variations in maximum depths and tolerance at different magnifications in the AM4917 and AM73915 models.
Maximum Depth Range
The maximum measurable depth that the device can perform is referred to as the maximum depth range. Usually, the higher the magnification, the lower the maximum depth range, and vice versa. The maximum depth range may also vary with depth acquisition direction (upward or downward).
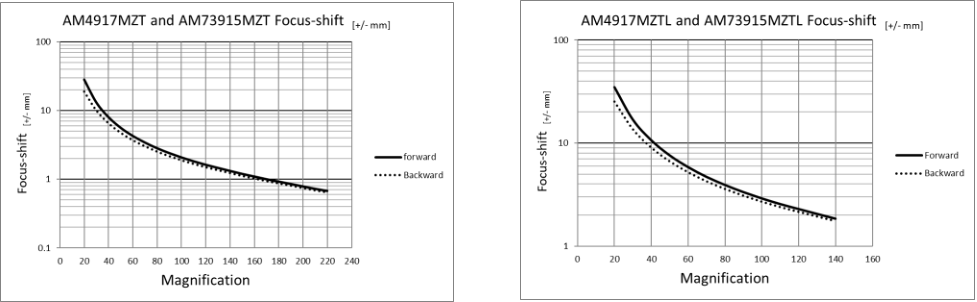

Tolerance
The tolerance is the allowable variance in DPQs. The higher the magnification, the lower the tolerance, and vice versa.
Table with Focus Shift Parameters of AM4917MZT, AM4917MZTL, AM73915MZT(R10), and AM73915MZTL(R10A)
Below is a table providing all the relevant parameters when acquiring depths with AM4917MZT, AM4917MZTL, AM73915MZT(R10), and AM73915MZTL(R10A) microscope models.
| AM4917MZT and AM73915MZT(R10) | |||
| Magnification | Max. Depth Range (+/- mm) (Down) | Max. Depth Range (+/- mm) (Up) | Tolerance (+/- mm) |
| 20 | 28.14 | 19.00 | 0.146 |
| 30 | 13.06 | 10.10 | 0.083 |
| 40 | 7.99 | 6.58 | 0.058 |
| 50 | 5.60 | 4.79 | 0.045 |
| 60 | 4.25 | 3.73 | 0.038 |
| 70 | 3.41 | 3.04 | 0.033 |
| 80 | 2.81 | 2.55 | 0.029 |
| 90 | 2.39 | 2.19 | 0.027 |
| 100 | 2.07 | 1.91 | 0.025 |
| 110 | 1.82 | 1.69 | 0.023 |
| 120 | 1.62 | 1.51 | 0.022 |
| 130 | 1.46 | 1.37 | 0.020 |
| 140 | 1.32 | 1.24 | 0.020 |
| 150 | 1.19 | 1.13 | 0.019 |
| 160 | 1.09 | 1.04 | 0.019 |
| 170 | 1.00 | 0.95 | 0.018 |
| 180 | 0.92 | 0.88 | 0.017 |
| 190 | 0.85 | 0.82 | 0.017 |
| 200 | 0.78 | 0.75 | 0.017 |
| 210 | 0.72 | 0.70 | 0.016 |
| 220 | 0.67 | 0.65 | 0.016 |
| AM4917MZTL and AM73915MZTL(R10A) | |||
| Magnification | Max. Depth Range (+/- mm) (Down) | Max. Depth Range (+/- mm) (Up) | Tolerance (+/- mm) |
| 20 | 34.94 | 25.25 | 0.251 |
| 30 | 16.89 | 13.62 | 0.149 |
| 40 | 10.65 | 9.04 | 0.108 |
| 50 | 7.59 | 6.65 | 0.087 |
| 60 | 5.83 | 5.22 | 0.074 |
| 70 | 4.69 | 4.26 | 0.065 |
| 80 | 3.91 | 3.59 | 0.059 |
| 90 | 3.34 | 3.09 | 0.054 |
| 100 | 2.90 | 2.70 | 0.051 |
| 110 | 2.55 | 2.40 | 0.048 |
| 120 | 2.28 | 2.16 | 0.046 |
| 130 | 2.05 | 1.94 | 0.044 |
| 140 | 1.84 | 1.75 | 0.042 |
