

Comparing Dino-Lite Models: Finding the Right Microscope for Your Needs
Microscopes are essential tools in various fields, such as biology, medicine, material science, and even art restoration. Dino-Lite stands out among the numerous brands for its versatility, ease of use, and technological innovations. However, selecting a suitable Dino-Lite microscope can be challenging, as many models exist. This article compares different Dino-Lite models to help you find the perfect microscope for your needs.
Overview of Dino-Lite Microscopes
Dino-Lite digital microscopes are known for their portability, digital integration, and high-quality imaging. They are widely used in educational institutions, research labs, industrial inspections, and even by hobbyists. Key features often include USB connectivity, variable magnification, LED lighting, and software compatibility for image capture and analysis.
Key Factors to Consider
1. Magnification Range
 Magnification is a critical factor in choosing a microscope. Dino-Lite offers a wide range of magnification options to suit various applications. Here are some of the numerous magnification ranges available:
- Basic Series (10x - 60x and 200x)
Ideal for home and light professional use where high resolution is not required.
- Universal Series (up to 220x)
Provides a broad selection of microscopes with user-friendly software and comprehensive measurement functions.
- High Magnification Series (400x, 500x and 900x)
Excellent for biomedical research, material analysis, and electronics inspection requiring examination of intricate structures.
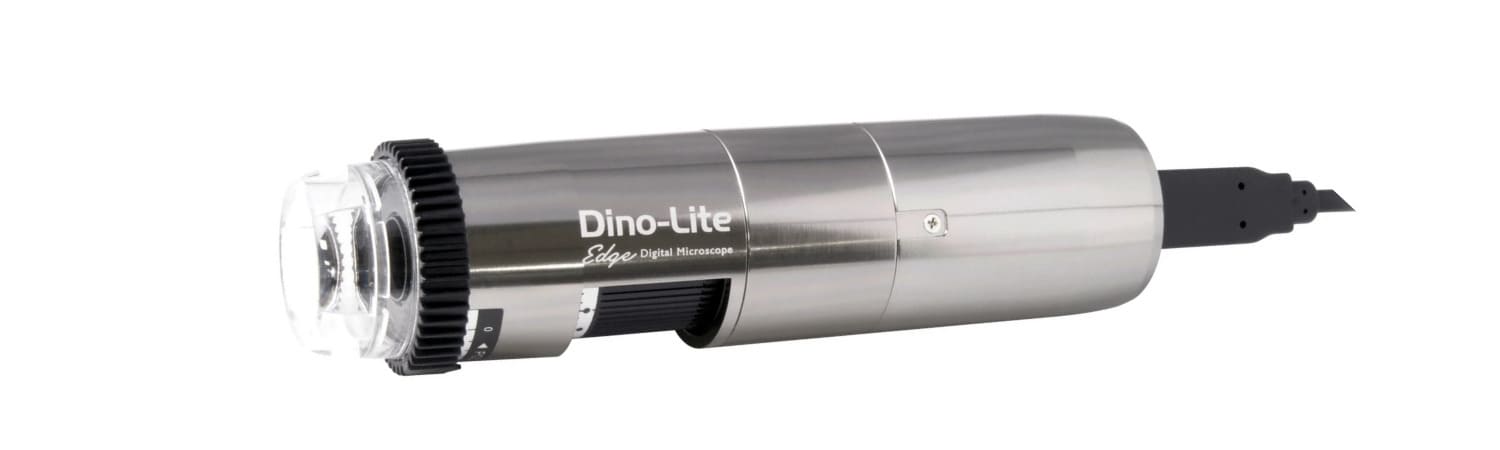
Dino-Lite also offers the Dino-Lite Edge series microscopes, which provide exceptional image quality, features, and a magnification range of 20x to 220x.
Remember that the choice of magnification range depends on the specific application. A lower magnification range will suffice if you need to examine large objects. However, a higher magnification range is necessary for observing minute details.
2. Resolution
 Dino-Lite digital microscopes offer various resolution options. Resolution determines the clarity and detail of the images.
Dino-Lite's VGA resolution microscopes are now legacy products. High-resolution models (1.3MP, 5MP, 8MP) offer a clear advantage for users prioritising exceptional image quality and precision in microscopic observations. These advanced microscopes cater to the growing needs of various fields where detailed imaging and accurate measurements are crucial.
Compared to lower-resolution models, 1.3MP Dino-Lite microscopes capture images with significantly more detail and sharpness, allowing for more precise observations and analysis. This resolution is suitable for academic research and routine laboratory work.
Compared to 1.3MP models, 5MP Dino-Lite microscopes offer even more significant benefits for applications requiring exceptional detail and image quality. The high resolution is essential for applications that require detailed image analysis, such as biomedical research and industrial quality control.
Stepping up from the already impressive 5MP resolution, 8MP Dino-Lite microscopes represent the pinnacle of image detail and clarity in the Dino-Lite lineup. They achieve this with high-quality imaging, natural-looking colours, and improved contrast.
3. Lighting
 Proper illumination is vital for accurate microscopy. Dino-Lite microscopes come with various lighting options to suit different applications.
a. White LEDs
This is the most common type of illumination found in Dino-Lite microscopes. They provide bright, adjustable light suitable for general observation and documentation.
b. Ultraviolet (UV) LEDs
Ultraviolet (UV) LEDs: These are used to observe fluorescent materials that emit visible light when exposed to UV radiation. Applications include forensics, gemstone identification, and checking for UV-reactive security markings.
c. Infrared (IR) LEDs
These emit invisible infrared light that is useful for observing objects through heat signatures. Applications include night vision observation, inspecting electronics for overheating components, and analysing the thermal properties of materials.
d. Polarizer
Some models include polarising filters to reduce glare from reflective surfaces, which is beneficial for examining metals and electronics. Polarisation also helps reduce reflections that can obscure details on shiny surfaces.
4. Connectivity and Software
 With over 150 different models, the Dino-Lite range offers multiple connectivity options: USB 2.0, USB 3.0, VGA, HDMI, and Wireless. This makes them user-friendly and versatile tools for various applications.
a. USB Connectivity
USB connectivity allows easy connection to computers for live viewing and image capture. USB models, widely compatible with most computers, are ideal for classroom settings and routine lab work.
However, USB 2.0 might be sufficient for basic applications or lower-resolution Dino-Lite microscopes. If you prioritise high-resolution image and video capture, smooth live viewing, and future-proofing your setup, a USB 3.0 Dino-Lite microscope is the better choice.
b. VGA and HDMI Connectivity
These connections are primarily designed for video output, allowing you to display the microscope's live feed on a monitor or projector. This can be beneficial for presentations, demonstrations, or collaborative work.
However, for most users who need image capture, measurement, and advanced functionalities, USB Dino-Lites (especially USB 3.0) offer a more versatile and feature-rich solution.
c. Wi-Fi Connectivity
Dino-Lite offers Wi-Fi connectivity through adapters like the WF-20 streamer. This provides a convenient and mobile solution for wireless observation and sharing microscopic images, especially beneficial when compared to USB connections in situations where freedom of movement and cable-free setup are crucial.
The WF-20 enables a wireless connection between Dino-Lite AF series microscopes and various devices, such as computers, tablets, or smartphones, eliminating the need for a physical cable.
d. Software Compatibility
Dino-Lite also provides DinoCapture software that is compatible with all connectivity types. This software empowers users to capture images and videos, conduct measurements, and incorporate annotations.
With its diverse connectivity options and accompanying software, Dino-Lite presents a versatile and user-friendly solution for various digital microscopy needs.
Comparing Popular Dino-Lite Models
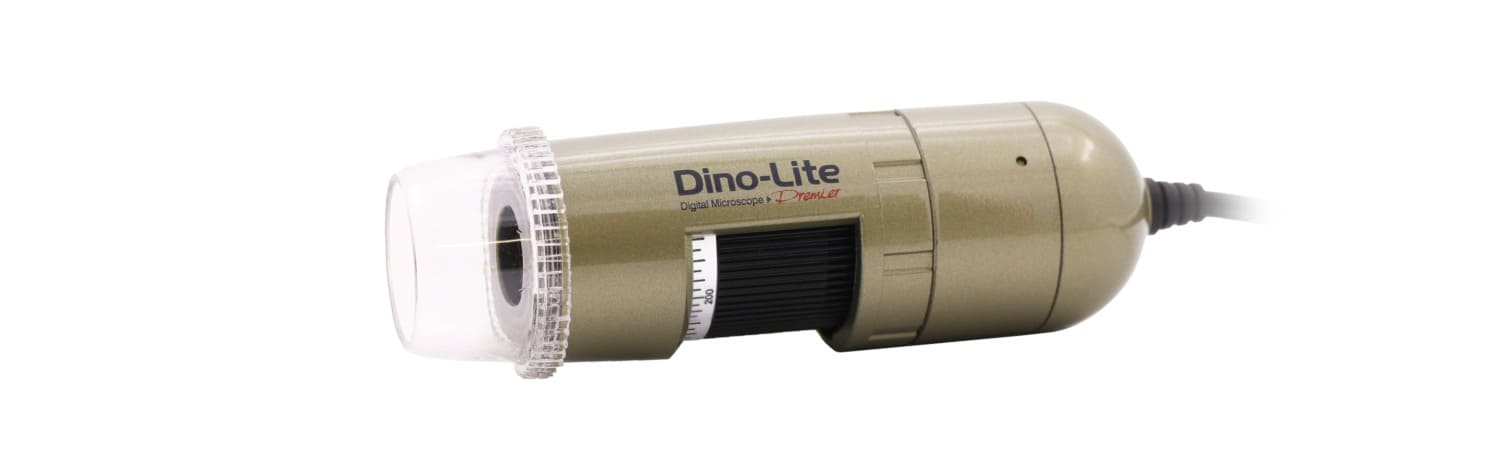
1. Dino-Lite AF3113T

- Magnification: 20x~55x, 220x
- Resolution: VGA (640×480)
- Lighting: 8 white LEDs
- Connectivity: USB 2.0
- Ideal for: Basic educational use, simple inspections
The Dino-Lite Premier AF3113T is designed for applications within a 220x magnification range. The digital microscope has LED brightness control, and its design can be adapted to a wireless digital microscope. Switch out the USB connection by attaching it to the WF-20 Wi-Fi streamer to turn it into a wholly cordless and portable microscope.
2. Dino-Lite AM4113ZT
- Magnification: 20x~50x, 200x
- Resolution: 1.3MP
- Lighting: 8 white LED lights switched on/off by the software
- Connectivity: USB 2.0
- Ideal for: Higher education, light industrial applications
The Dino-Lite AM4113ZT digital microscope is perfect for anyone who needs superior image clarity up to 200x. It’s easy to use and comes with free software (DinoCapture 2.0 for Windows and DinoXcope for Mac) that lets you take pictures and make precise measurements. The AM4113ZT is a versatile tool for examining everything from circuit boards to jewellery.
3. Dino-Lite AF4915ZT

- Magnification: 20x~220x
- Resolution: 1.3MP
- Lighting: 8 white LEDs
- Connectivity: USB 2.0
- Ideal for: Applications demanding detailed observation and accurate measurements
The Dino-Lite AF4915ZT is a high-performance USB microscope with optional wireless connectivity via the WF-20 adapter. It boasts exceptional image quality, high optical resolution, and up to 220x magnification.
This advanced model goes beyond basic observation by offering a suite of premium features: Extended Depth of Field (EDOF), Extended Dynamic Range (EDR), Flexible LED control (FLC), an integrated polariser, and Automatic Magnification Reading (AMR) for precise results.
4. Dino-Lite AF7915MZTL

- Magnification: 10x~140x
- Resolution: 5MP
- Lighting: 8 White LEDs
- Connectivity: USB 2.0
- Ideal for: Advanced industrial applications, detailed scientific research
The Dino-Lite AF7915MZTL excels in tasks needing a long working distance and a wider field of view (10x-140x magnification). Its 5MP sensor delivers sharp images, a built-in polariser reduces glare, and Flexible LED Control allows precise lighting adjustments. It easily tackles detailed observation and measurements with features like EDOF, AMR, and EDR.
5. Dino-Lite AM8917MZT
- Magnification: 10x~220x
- Resolution: 8MP
- Lighting: 8 White LEDs
- Connectivity: USB 2.0
- Ideal for: Advanced industrial applications, detailed scientific research
The Dino-Lite AM8917MZT is a handheld digital microscope that redefines the limits of handheld microscopy. Its long working distance and magnification range of 10x to 220x allows you to analyse objects with unmatched detail and flexibility, making it ideal for various applications.
Equipped with an 8-megapixel sensor, the AM8917MZT delivers stunning image resolution and exceptional colour fidelity, ensuring you capture natural-looking and detailed images of your samples. This, combined with advanced features like a polariser, DPQ, EDOF, EDR, AMR, and eFLC, makes the AM8917MZT a versatile tool for various tasks.
Digital Microscope Distributor in Singapore
LFC PTE LTD is the official distributor of digital microscopes in Singapore. Please contact our team to discuss your company’s need for a digital microscope.
You can also visit our Facebook, Instagram, YouTube, and LinkedIn pages to get the latest updates about other industrial equipment.
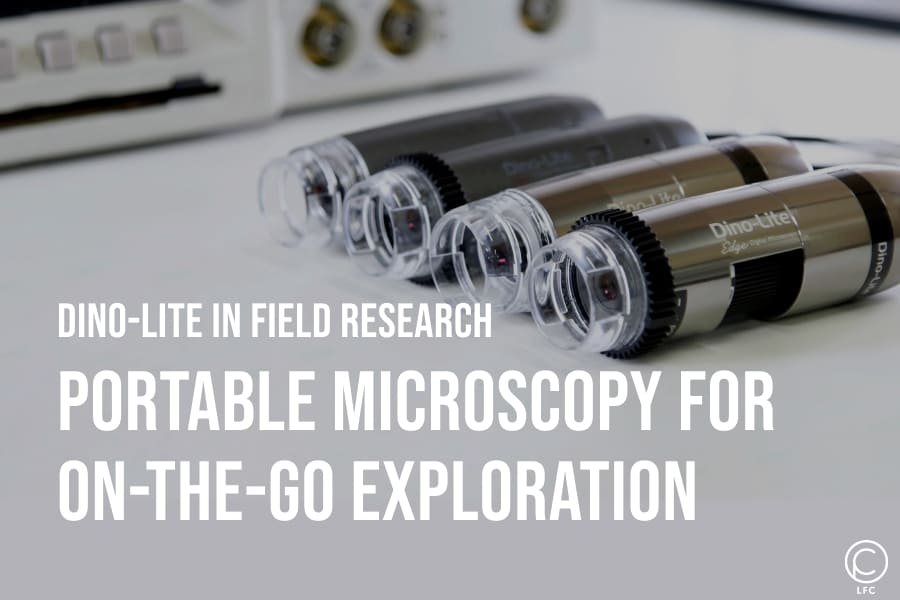
Dino-Lite in Field Research: Portable Microscopy for On-the-Go Exploration
Field research often demands versatile and robust tools. The Dino-Lite portable digital microscope is one indispensable tool that has revolutionized on-the-go scientific exploration. Renowned for their compact size, ease of use, and powerful magnification capabilities, Dino-Lite microscopes transform how researchers conduct field studies across various disciplines.
The Rise of Portable Microscopy

Conventional microscopy has long been confined to the laboratory due to microscopes' size, fragility, and power requirements. This limitation often necessitated transporting samples back to the lab for analysis, which could degrade sample quality and delay findings. However, technological advancements have paved the way for portable microscopy, and Dino-Lite stands at the forefront of this movement.
Key Features of Dino-Lite Microscopes

1. Portability
Dino-Lite microscopes are designed to be lightweight and compact, making them easy to carry in the field. This portability allows researchers to conduct in-situ analyses, preserving the integrity of their samples and providing immediate results.
2. High Magnification and Resolution
Despite their small size, Dino-Lite microscopes offer impressive magnification ranges, typically from 10x to over 200x, with some models reaching up to 900x. The high-resolution imaging ensures that minute details are captured with clarity.
3. Digital Integration
Equipped with USB connectivity, Dino-Lite microscopes can be easily connected to laptops, tablets, and smartphones. This digital integration allows for real-time viewing, image capture, and data sharing, enhancing collaborative efforts in the field.
4. Versatility
Dino-Lite offers a variety of models tailored to specific research needs. Whether it's a polarising model for geological studies, an ultraviolet model for forensic analysis, or an infrared model for plant sciences, there is a Dino-Lite microscope suited to virtually every field of research.
5. Durability
Field conditions can be harsh, but Dino-Lite microscopes are built to withstand these environments. Many models have robust casings and protective accessories that ensure the microscope remains functional despite rough handling or adverse weather conditions.
Applications in Field Research
The versatility of Dino-Lite microscopes allows for their application across a wide range of scientific disciplines:
1. Ecology and Environmental Science

In ecology and environmental science, the ability to analyze samples on-site is crucial for understanding the complexities of ecosystems. Dino-Lite microscopes enable researchers to:
a. Study Plant Structures
Botanists can directly examine leaf surfaces, cell structures, and fungal infections in their natural habitats. This immediate analysis helps in understanding plant health and disease spread without the delay of lab processing.
B. Analyse Soil Samples
Soil scientists can investigate soil texture, particle size, and microbial communities on-site. This is particularly useful for assessing soil health, fertility, and the impact of environmental changes.
C. Examine Water Microorganisms
Limnologists and marine biologists can use Dino-Lite microscopes to study microorganisms in freshwater and marine environments. This on-the-spot analysis is critical for monitoring water quality and the health of aquatic ecosystems.
2. Geology

Geologists benefit from the portability of Dino-Lite microscopes in several ways:
a. Mineral Identification
Field geologists can quickly identify minerals and their properties, such as crystal structure and composition, essential for geological mapping and exploration.
B. Rock Formation Analysis
By examining rock textures and microstructures in the field, geologists can immediately interpret geological history and processes, aiding in more accurate field studies and resource evaluations.
C. Fossil Examination
Paleontologists can analyze fossilized remains in situ, allowing for precise documentation and minimizing the risk of damage during transportation.
3. Archaeology
 In archaeology, preserving the context of artifacts and site materials is paramount. Dino-Lite microscopes facilitate:
a. Artefact Examination
Archaeologists can scrutinize the surface details of artifacts, such as tool marks and wear patterns, on-site. This immediate analysis can provide insights into the artifact's use and origin.
B. Fossil and Remains Analysis
Dino-Lite microscopes allow for the close examination of bones and other remains, helping to determine species, age, and health of past populations.
C. Site Material Studies
The ability to study soil and material layers in the field helps archaeologists understand the stratigraphy and chronology of archaeological sites.
4. Forensics
 Forensic scientists rely on Dino-Lite microscopes for their precision and portability:
a. Fiber and Hair Analysis
Investigators can quickly identify and compare fibers and hairs found at crime scenes, crucial for linking suspects to crime scenes or victims.
B. Residue and Trace Evidence
The ability to analyze gunshot residues, paint chips, and other trace materials on-site accelerates the investigative process and ensures the integrity of evidence.
C. Biological Materials
Dino-Lite microscopes can directly examine biological samples at the scene, such as blood and other body fluids, aiding in rapid and accurate evidence collection.
5. Education and Outreach
 Dino-Lite microscopes are also valuable in educational settings and public outreach:
a. Educational Tool
Schools and universities can use these microscopes to provide students with hands-on learning experiences. The portability allows for outdoor classes and field trips where students can explore natural samples in real time.
B. Public Engagement
Museums, nature centers, and science outreach programs can use Dino-Lite microscopes to engage the public. Visitors can observe details of natural specimens, sparking curiosity and interest in science.
Case Studies Using Dino-Lite
Several field studies have demonstrated the efficacy of Dino-Lite microscopes:
1. Coral Reef Health Monitoring
In a study of coral reefs, researchers used Dino-Lite microscopes to analyze polyps and algae interactions on-site. This immediate examination allowed for real-time assessment of coral health and the impacts of environmental stressors such as bleaching and pollution.
2. Crime Scene Investigation
Forensic scientists employed Dino-Lite microscopes to examine trace evidence like fibers and residues at crime scenes. The ability to perform on-site analysis reduced the time required to process the scenes. It increased the accuracy of evidence collection, leading to quicker and more reliable investigation results.
3. Geological Fieldwork
During a geological expedition, researchers used Dino-Lite microscopes to identify minerals and rock microstructures in remote locations. This capability facilitated more accurate geological mapping and resource assessment without transporting heavy samples back to the laboratory.
4. Archaeological Excavations
Archaeologists used Dino-Lite microscopes to examine artefacts and soil samples at excavation sites directly. This on-the-spot analysis preserved the archaeological context and provided immediate insights into the findings, enhancing the overall efficiency and effectiveness of the excavation process.
Digital Microscope Distributor in Singapore
LFC PTE LTD is the official distributor of digital microscopes in Singapore. Please contact our team to discuss your company’s need for a digital microscope.
You can also visit our Facebook, Instagram, YouTube, and LinkedIn pages to get the latest updates about other industrial equipment.
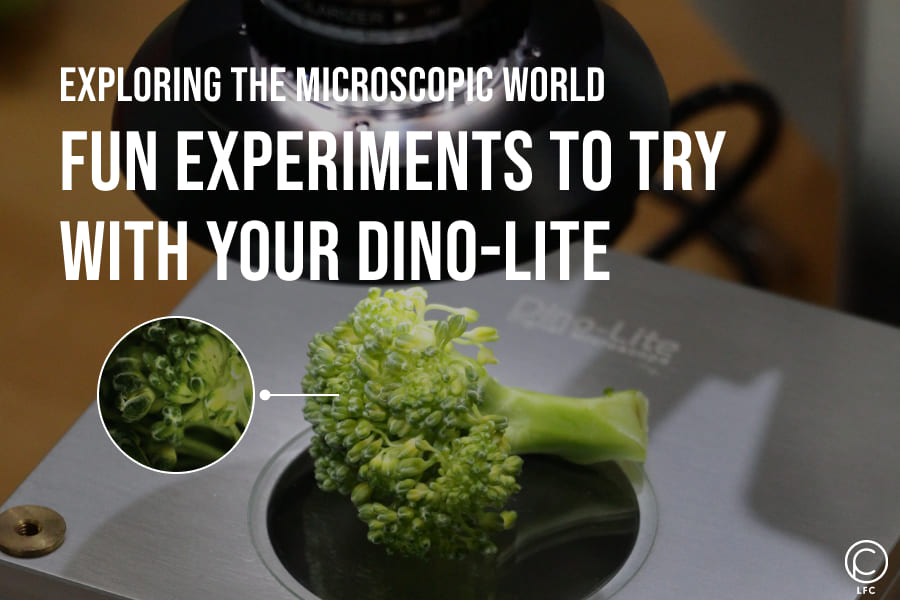
Exploring the Microscopic World: Fun Experiments to Try with Your Dino-Lite
The world of the microscopic is a fascinating realm teeming with life and intricate structures invisible to the naked eye. With advancements in technology, exploring this hidden universe has become more accessible and engaging than ever before. One such tool that has revolutionized the way we interact with the microscopic world is the Dino-Lite. This portable digital microscope allows users to magnify and capture images and videos of tiny objects with astonishing clarity. In this article, we’ll delve into some exciting experiments you can conduct with your Dino-Lite to uncover the wonders of the microscopic world.
Pond Water Safari

Embarking on a journey to your nearest pond or lake is like entering a portal to a hidden realm, where the boundaries between the known and the unknown blur into obscurity. With a sense of anticipation humming in the air, you approach the water’s edge, where the gentle ripples of the surface beckon you to peer beneath the tranquil facade. Armed with nothing more than a clean container and an eager spirit, you dip below the surface, the water’s cool embrace enveloping you like a welcoming embrace. With each scoop, you capture not just water but a myriad of unseen wonders—a symphony of life waiting to be discovered.
Returning to your exploration station, you carefully deposit a droplet of the collected water onto a glass slide, watching it spread like a miniature oasis amidst the barren expanse. With practiced precision, you lower a coverslip onto the droplet, sealing within it the essence of the aquatic realm. And as you peer through the lens of your Dino-Lite microscope, you are greeted by a spectacle beyond imagination—a hidden world teeming with life, where the tiniest of organisms dance and dart with the grace of prima ballerinas. In the intricate tapestry of algae and protozoa, you glimpse the interconnectedness of all living things, a reminder that even in the smallest creatures, a world of wonder awaits exploration.
Household Items Up Close

Gathering an assortment of household items, you embark on a journey of discovery that promises to unveil the hidden intricacies of the everyday world. With each fabric swatch, paper scrap, or granule of salt and sugar carefully arranged on a glass slide, you lay the foundation for exploring the unseen realms beyond the surface. As you peer through the lens of the Dino-Lite microscope, you are transported into a world where the ordinary transforms into the extraordinary, where the mundane gives way to the mesmerizing.
In the weave of fabric fibers, you uncover a universe of patterns and textures that defy comprehension, each thread a testament to the skill and artistry of human craftsmanship. From the delicate lacework of cotton to the sturdy interlocking of wool, each fabric tells a story—a tale of resilience, durability, and timeless beauty. As you trace the contours of each fiber with the tip of your microscope, you marvel at the complexity of their arrangement, a testament to the ingenuity of nature’s design.
Insect Anatomy

For those fortunate enough to have access to deceased insects, a treasure trove of discovery awaits as you delve into the intricate anatomy of these miniature marvels. Carefully placing an insect specimen onto a glass slide initiates a journey into the heart of insect biology. Under the discerning gaze of the Dino-Lite microscope, the once mundane insect transforms into a spectacle of complexity and adaptation.
As you observe the insect’s compound eyes, each facet a window to a different aspect of its environment, you gain insight into the remarkable visual acuity of these creatures. The intricate wing structures, once mere appendages for flight, now reveal themselves as marvels of aerodynamic engineering, finely tuned for efficiency and agility. As you trace the delicate hairs covering the insect’s body, you uncover a sensory landscape teeming with information, each hair a receptor for touch, taste, and smell. In the minutiae of insect anatomy, you find not just a reflection of their biology but a testament to the ingenuity and resilience of life itself.
Plant Cells and Tissues

Delving into the microscopic world of plant biology unveils a realm of intricate structures and interwoven complexities that sustain life on our planet. With a thin slice of plant material delicately mounted onto a glass slide, you embark on a journey into the heart of botanical science. With the Dino-Lite microscope as your guide, you peer into the cellular architecture of leaves, stems, and other plant tissues, each cell a microcosm of activity and adaptation.
As you observe the arrangement of cells within the plant material, a tapestry of life unfolds before you, revealing the elegant symphony of structures that enable plants to thrive and flourish. Chloroplasts, the green organelles responsible for photosynthesis, stand out like jewels amidst the cellular landscape, capturing the essence of sunlight and transforming it into the sustenance that fuels all living things. As you delve deeper into the microscopic intricacies of plant biology, you gain a newfound appreciation for plants’ vital role in the natural world, from producing oxygen to providing food and shelter for countless organisms.
Microscopic Treasure Hunt

Embarking on a microscopic treasure hunt is akin to setting sail on an expedition to uncover the hidden gems within the fabric of the world around us. Armed with the Dino-Lite microscope as your trusty compass, you navigate the vast expanse of natural and artificial materials, each holding the promise of discovery. With each sample meticulously prepared and placed beneath the lens, you embark on a journey of exploration that transcends the boundaries of the visible world.
As you peer through the lens of the Dino-Lite, you are greeted by a kaleidoscope of wonders that defy expectations and ignite the imagination. Tiny crystals emerge like glittering diamonds amidst a sea of particles, their intricate lattice structures a testament to the forces that shape our universe. Microorganisms, too, reveal themselves as hidden inhabitants of the microscopic realm, their vibrant colors and intricate forms a testament to the diversity of life on Earth. And amidst it all, unexpected patterns and shapes emerge at high magnifications, offering tantalizing glimpses into the hidden order that underpins the chaos of the world around us. In the pursuit of microscopic treasures, you realize that the true beauty lies not just in the objects themselves but in the sense of wonder and curiosity that drives us to explore the unknown.
Digital Microscope Distributor in Singapore
LFC PTE LTD is the official distributor of digital microscopes in Singapore. Please contact our team to discuss your company’s need for a digital microscope.
You can also visit our Facebook, Instagram, YouTube, and LinkedIn pages to get the latest updates about other industrial equipment.

Beginner's Guide to Using Your Dino-Lite Digital Microscope
Welcome to the world of digital microscopy! If you’ve recently acquired a Dino-Lite digital microscope, you’re about to unlock a fascinating realm of microscopic exploration. This guide is designed to help you get started with your new device, covering everything from basic setup and operation to essential maintenance tips. Whether you're a hobbyist, student, or professional, this guide will ensure you get the most out of your Dino-Lite digital microscope.
Setting Up Your Dino-Lite Digital Microscope
1. Unboxing and Initial Inspection
When you first unbox your Dino-Lite digital microscope, it’s essential to ensure all components are in good condition. This will help you avoid any issues when you start using your microscope. Here's a detailed step-by-step guide to help you through this process.
Carefully open the box and lay out all the components. You should have the following items:
- Dino-Lite Digital Microscope: This is the primary device, and it should be securely packed to prevent any damage during shipping.
- USB Cable: This cable connects your Dino-Lite microscope to your computer. Make sure it is not frayed or damaged.
- Software CD or Download Link: Some packages include a CD with the DinoCapture software, while others might provide a link to download the software from the Internet. Ensure you have access to the software required to operate the microscope.
- User Manual: The manual provides important information about setting up and using your microscope. Reading it to understand the device’s features and functions is essential.
Inspect the microscope and accessories for any visible damage that may have occurred during shipping.

2. Installing the Software
- Download the Software: Visit the Dino-Lite website and download the latest version of the DinoCapture software. If you have a software CD, you can use it to install the software.
- Install the Software: Follow the on-screen instructions to install the software on your computer. The software is compatible with both Windows and Mac operating systems.
- Connect the Microscope: Plug one end of the USB cable into your Dino-Lite microscope and the other into your computer. The computer should recognise the device automatically.
3. Initial Setup

- Launch DinoCapture: Open the DinoCapture software on your computer.
- Adjust Settings: Familiarize yourself with the interface. Adjust the resolution, lighting, and other settings as per your needs.
- Calibration: If your model includes a calibration tool, follow the user manual's instructions to calibrate the microscope for accurate measurements.
Operating Your Dino-Lite Digital Microscope
1. Basic Usage

a. Positioning the Microscope
- Choose a clean, stable, and well-lit surface to work on. A clutter-free area will help you avoid distractions and accidental bumps.
- Lay the object or specimen you wish to examine on the surface. If you have a microscope stand, use it to hold the microscope steady, especially for prolonged observation or high magnification.
- Hold the Dino-Lite microscope close to the specimen. Make sure the lens is directed at the area you want to observe.
- Use tweezers or a specimen holder to position the object without touching it directly for small or delicate specimens.
b. Focusing
- To adjust the lens, use the focus dial on the Dino-Lite microscope. Start by turning the dial to bring the specimen into approximate focus.
- Slowly turn the focus dial until the image on your computer screen becomes clear. The live feed in the DinoCapture software will show the specimen in real-time, allowing you to make precise adjustments.
- Some Dino-Lite models have a digital zoom feature. The zoom controls in the software allow you to examine specific areas of the specimen closer without physically moving the microscope.
c. Adjusting Lighting
- Dino-Lite microscopes are equipped with built-in LED lights to illuminate your specimen. Proper lighting is crucial for capturing clear and detailed images.
- Open the DinoCapture software and find the lighting controls. Adjust the brightness level to ensure your specimen is well-lit. Too much light can cause glare, while too little light can make the image dark and unclear.
- For some specimens, changing the angle of the light can reveal different details. Experiment with the position and intensity of the lighting to get the best view.
d. Capturing Images and Videos
- In the DinoCapture software, locate the camera icon or the capture button.
- Focus on the area you wish to capture and click the button to take a still image. The image will be saved to your computer’s designated folder.
- To record a video, find the video recording button in the software.
- Click the button to start recording, and move the microscope slowly and steadily if you need to change the view during the recording.
- Click the stop button to end the recording. The video file will be saved automatically.
- Name and organise your files immediately after capturing them to make it easier to find specific images or videos later.
- Use descriptive names and create folders for different projects or types of specimens.
2. Advanced Features

Your Dino-Lite digital microscope has various advanced features that greatly enhance your ability to observe, analyse, and document your specimens. Here’s a closer look at the measurement tools, annotation capabilities, and time-lapse recording features offered by the DinoCapture software.
a. Measurement Tools
The DinoCapture software includes robust tools for measuring the dimensions of the objects you observe. Accurate measurement is crucial for applications in scientific research, quality control, and detailed analysis. To use this feature effectively, it’s essential to calibrate your microscope correctly. Calibration adjusts the software to your microscope's specific magnification and distance settings.
After calibration, you can use various tools such as linear measurements, angles, circles, and areas. Select the appropriate tool from the software's toolbar, click on the starting point on the live feed or captured image, drag it to the endpoint, and display the measurement based on the calibrated scale. These measurements can be saved with the image file or exported for further analysis in other software programs.
b. Annotations
Adding annotations to your images can significantly enhance the clarity and detail of your observations. The DinoCapture software allows you to annotate images with text, lines, and shapes to highlight important information. To add text, select the text tool from the toolbar, click on the desired location on the image, and type your annotation.
You can adjust the font size, style, and colour to suit your needs. Select the appropriate tool for drawing lines or shapes, click it, and drag it to create the annotation on the image. The selection tool allows annotations to be resized, moved, or deleted. This feature is handy for presentations, reports, or collaborative work, as it helps to communicate specific observations and findings.
c. Time-lapse Recording
Some Dino-Lite microscope models support time-lapse recording, a feature that allows you to capture changes in your specimen over time. This can be especially useful for observing slow processes such as the growth of microorganisms, chemical reactions, or other gradual changes. Open the DinoCapture software and navigate to the time-lapse settings to set up time-lapse recording.
Select the interval at which you want images to be captured (e.g., every 10 seconds, 1 minute, etc.), then start the time-lapse recording. The software will automatically capture images at the specified intervals, and once the recording is complete, it will compile the pictures into a time-lapse video. This video can be played back to review the changes over time and exported for presentations, analysis, or sharing with others.
Maintaining Your Dino-Lite Digital Microscope
 1. Cleaning and Care
- Lens Cleaning: Clean the lens with a soft, lint-free cloth. Avoid using harsh chemicals that could damage the lens coating.
- Body Cleaning: Wipe the microscope’s body with a damp cloth. Ensure it is unplugged from the computer while cleaning.
- Storage: Store the microscope in a dry, dust-free environment. If a protective case is provided, use it.
2. Regular Maintenance
- Software Updates: Check the Dino-Lite website regularly for updates to ensure you have the latest features and improvements.
- Firmware Updates: Some models may require firmware updates. To update your microscope's firmware, follow the instructions on the Dino-Lite website.
3. Troubleshooting
- Connection Issues: Use a different USB port or cable if your computer does not recognise the microscope. Ensure your software is up to date.
- Image Quality Problems: Check the cleanliness of the lens and adjust the focus and lighting settings. Ensure your computer meets the software’s system requirements.
Digital Microscope Distributor in Singapore
LFC PTE LTD is the official distributor of digital microscopes in Singapore. Please contact our team to discuss your company’s need for a digital microscope.
You can also visit our Facebook, Instagram, YouTube, and LinkedIn pages to get the latest updates about other industrial equipment.
Digital Microscope - What Makes It Different?
Microscopes are essential for observing small objects, with the light microscope being one of the most commonly used. However, light microscopes require users to have sharp vision, which can be a limitation.
Digital microscopes offer a significant improvement, providing higher contrast images without relying on the user’s eyesight. Here’s an overview of digital microscopes and their advantages.
What is a Digital Microscope?
A digital microscope features a small digital camera that captures images. These images can be displayed on a computer monitor and saved as digital files for future use. If connected to a printer, the images can also be printed.
Differences Between Digital and Light Microscopes
 Light microscopes, which have been used long before digital ones, require manual adjustment of lens combinations to achieve the desired magnification and focus. This process can be challenging, especially for those who are untrained or need better vision.
In contrast, digital microscopes simplify the process. Users can view the object directly on a monitor, creating more precise and detailed images. This ease of use has led many industries to transition to digital microscopes.
Advantages of Digital Microscopes
Digital microscopes offer several modern benefits:
- 3D Viewing: Digital USB microscopes can capture and display images in 3D.
- Real-Time Imaging: Images can be enlarged and viewed in real time.
- Easy Storage and Sharing: Images can be easily saved and transferred to a computer.
- Versatility: Suitable for a wide range of observations.
- High-Quality Imaging: Equipped with features that support high-quality images.
- Efficiency: Fast and straightforward operation.
Digital Microscope Components

A digital microscope consists of the following parts:
- USB Connector: The cable that connects the microscope to a computer.
- Microtouch Sensors: Touchscreen sensors capture images and control the LEDs.
- Lock (Scroll Lock): Secures the selected magnification.
- Magnification Dial: Adjusts the magnification power.
- Adjustable Magnification: Displays the variable magnification levels.
- Lighting: LED lights for illumination during observations.
- Polarizer Settings: An optical filter to reduce glare and polarized light.
- Optical Camera: Captures images with specific resolution and size.
Digital Microscope Features

Standard features of Dino-Lite digital microscopes include:
- FLC (Flexible LED Control): Adjusts LED brightness and allows quadrant-specific control.
- Microtouch Sensor triggers image capture and is controllable via DinoCapture (Windows) or DinoXcope (Mac OS) software.
- Automatic Magnification Reading (AMR): Displays magnification via software, available on select Edge Series AMR models.
- Polarization: Allows for adjustable full or half polarization on specific models.
- Diffuser: A polyoxymethylene plastic insert that evenly distributes light to reduce glare.
- Axial Illumination (AXI): Provides axial or brightfield illumination, which is controllable via software.
Applications of Digital Microscopes
Digital microscopes are used in various sectors, including:
- Industrial Sector: For visual inspections, detecting scratches, corrosion, and wear in industries like textiles, metal, aerospace, and electronics.
- Medical Sector: For medical examinations and observations in fields such as dermatology and trichoscopy.
- Jewelry and Crafts Sector: For detailed work with precious metals and gems.
- Education Sector: Facilitates easy observation of biological specimens for students.
- Research and Development Sector: Enables researchers to examine microscopic organisms and specimens with micron-level precision.
Examples of Digital Microscopes
1. Dino-Lite Edge 5 MP AM7115MTF Digital Microscope
 The AM7115MTF offers high-resolution images and up to 70x magnification at a working distance of 115mm. AM7115MTF has FLC, ELWD, and Interchangeable Cap features and precise image quality.
2. Dino-Lite Edge 1.3MP AF4915ZT Digital Microscope
 Dino-Lite Edge AF4915ZT (1.3MP), a complete portable microscope with a customizable interface, is designed to meet most professional applications in 20~220x magnification. The AF4915ZT is equipped with EDOF, EDR, AMR, and FLC features and clear image quality, making it one of the most versatile Dino-Lite devices.
3. Dino-Lite Premier AM4113T Digital Microscope
 A portable digital microscope that provides superior image quality with up to 200x optical magnification and a 1.3 Megapixel sensor. Suitable for applications that require working distance/space under the microscope.
4. Dino-Lite Edge AM73915MZT Digital Microscope
 Dino-Lite Edge AM73915MZT is an all-in-one device with USB 3.0 connection capabilities. It is suitable for professional applications with 10-220x magnification and is equipped with advanced EDOF/EDR, AMR, and FLC functions, making it one of the most versatile devices.
Digital Microscope Distributor in Singapore
LFC PTE LTD is the official distributor of digital microscopes in Singapore. Please contact our team to discuss your company's need for a digital microscope.
You can also visit our Facebook, Instagram, YouTube, and LinkedIn pages to get the latest updates about other industrial equipment.
Uses of Dino-lite Digital Microscope for Detect Abnormal Scar Formation
Interactive platform for peer studying biological and general microscopy. The dino-Lite microscope provides one of the most essential platforms for studying biological sciences and general microscopy science. It allows students and lecturers, as users, to peer into the world of the cell and discover the fascinating world of microscopic organisms and specimens with micron precision.
Detect Abnormal Scar Formation

Detecting skin diseases was tough and painful. The only tool was a biopsy, where a skin tissue sample was extracted and sent for laboratory testing. The procedure is very inconvenient for patients, and an open wound also risks infections and needs a suture, which must be removed later.
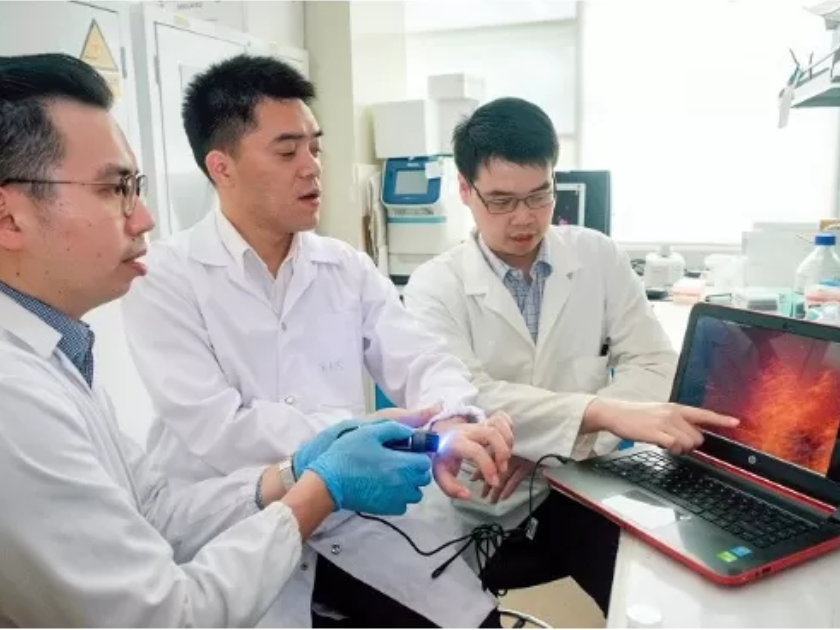
Recently, a team led by Assistant Professor Xu Chenjie from Nanyang Technological University’s School of Chemical and Biomedical Engineering, nanoscience expert Professor Chad A. Mirkin from Northwestern University, and Dr Amy S. Paller, Chair of Dermatology at Northwestern University Feinberg School of Medicine, developed a new technique.
The new method is much more painless and allows doctors to take preventive measures earlier to help reduce the chances of severe scarring. Using new nanoparticles, the joint research team has shown in animal and human skin samples the potential to quickly and accurately predict whether a wound will likely lead to excessive scarring, as in keloids and skin contractures.
Published last month in the Nature Biomedical Engineering journal, the new detection method uses thousands of nanoparticles called NanoFlares, which have DNA strands attached to their surfaces like a ball of spikes.
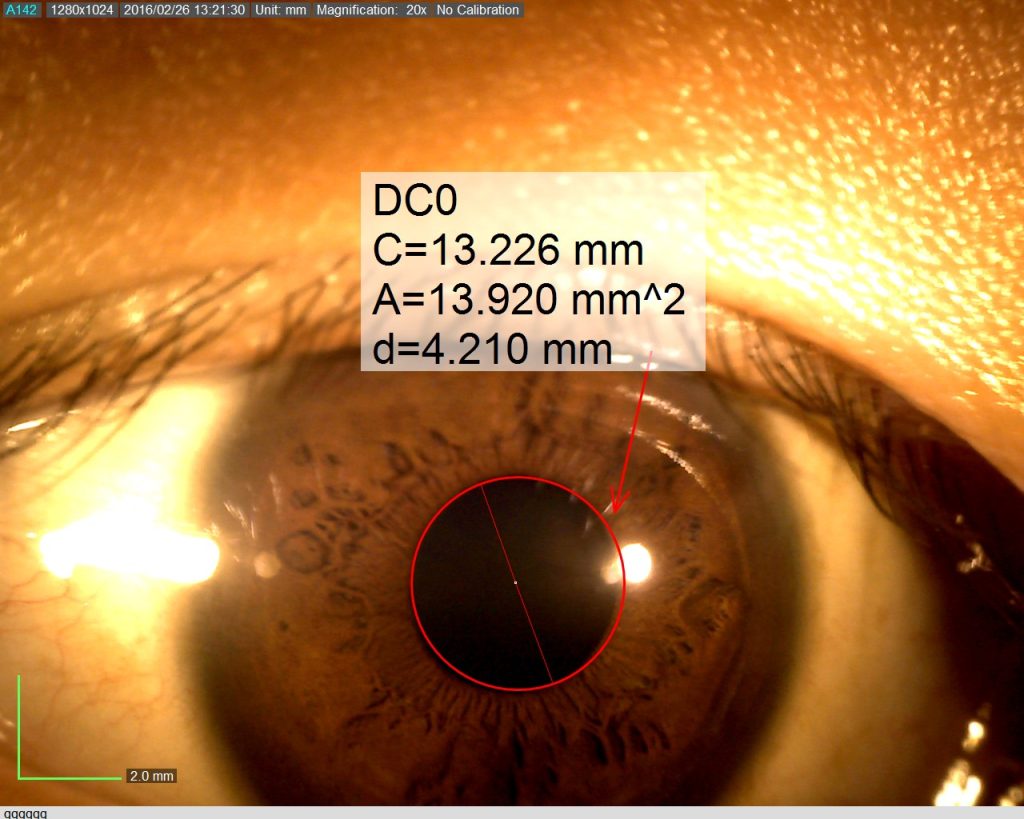
These nanoparticles are applied to closed wounds using a cream. After the nanoparticles have penetrated the skin cells for 24 hours, a handheld fluorescence microscope is used to look for signals from the nanoparticles’ interaction with target biomarkers inside the skin cells.
Using the Dino-Lite AM4115T-GFBW, when fluorescence signals are detected, they indicate abnormal scarring activity and preventive action can be taken to avoid heavier scarring.
Assistant Professor Xu Chenjie said: “When our bioengineered nanoparticles are applied on the skin, they will penetrate up to 2mm below the skin surface and enter scar cells.”
In other recently published or accepted peer-reviewed journal articles, such as an SLAS Technology commentary, Dr Yeo further elaborates on the potential applications of NanoFlares for other skin diseases, such as skin cancer, since the DNA sequences on the nanoparticles are interchangeable.
The team has filed a patent application based on this technology through NTU’s innovation and commercialization arm, NTUitive, and will conduct a clinical trial by mid-2019.
References:
New nanoparticles help to detect severe wound
Nanoflares shine a light on the formation of scar tissue
New method to detect abnormal scar formation
Using Dino-Lite for Art Conservation & Restoration
Over the past eight years, the Dino-Lite digital microscope has helped users worldwide increase their productivity in a wide range of mundane to mission-critical applications. Due to its superior image quality, compact form factor, and ease of use, this product has quickly risen to a dominant position in the marketplace. From its initial success, the product line has expanded to include hundreds of models ( and accessories) to fulfill specific customer needs. As a result, the Dino-Lite microscope is now an indispensable tool in multiple market sectors, such as academics, manufacturing, quality control, healthcare, and education.
Art Conservation & Restoration
Art conservation is both an art and a science. The object of interest ranges from sculptures, ceramics, paper scrolls (books, rolls, etc.), textiles, and architecture. Some could be performed in the lab, while others can only be done onsite. A microscope is a necessary tool in art conservation and restoration. They are used in non-destructive analysis and characterization tests of the piece. Hence, the Dino-Lite digital microscope, being small, light, and portable, is an excellent help for anyone in this field of work.
A dino-Lite digital microscope is a good support tool for art conservationists to restore and conserve objects and works of artists from the past. The portable digital microscope is held comfortably in your hand. It connects to a laptop via a USB cable. The magnified image then appears on the screen through the DinoCapture 2.0 software. The alternative will be to look through an eyepiece of a stereo microscope. The Dino-Lite digital microscopes have high magnification and built-in LED lights to illuminate the examined object. It is a portable microscope that will be a valuable visual aid to see details the naked eye cannot see. The small and light form factor makes it helpful in analyzing large-sized artworks, which can be challenging to reach with the traditional stereo microscope.
When used to inspect sculptures, ceramics, or architecture, the digital microscope can also help identify the different stone types, such as marble or limestone. It can also be used to analyze the components in mortars. With the DinoCapture 2.0 software, users can also easily take pictures or videos for documentation. Other analysis tools available on the software include measurements of lines, circles, diameters, radii, angles, center distance, etc. As such, it is a neat tool for measuring the size of the sand granules in mortar. It can also be used as a diagnostic tool for identifying the source of the stone’s deterioration, helping to identify salts, pollution, and biological growth. It can even locate historic tool marks and past conservation treatments. When looking at a stain at a higher magnification, as a user, you would be able to differentiate if the stains come from pollution or fungus, for example.
Unique lighting models with UV or infrared lights can help the user view hidden details in the art piece. For instance, the AM4115-FKT has 780 nm infrared LED lighting and records high-quality images at 1.3 Megapixels. This model can also magnify objects up to 200x. It is ideal for analyzing the chemical and physical properties of paper. On the other hand, the AF4515T-FVW comes with a 400 nm UV light source. The UV light source is a good aid for revealing historical moisture and mold damage to a paper. These are not always visible to the naked eye. Areas of the paper previously in contact with water, where size and the products that cause fluorescence have been removed, appear darker under UV light. All this information can then aid the decision-making process of forming a suitable conservation treatment.
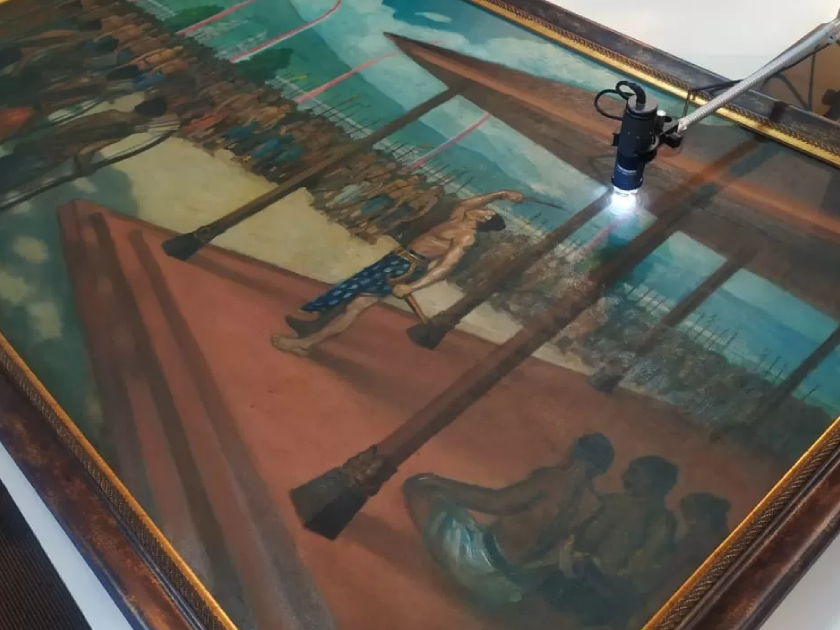
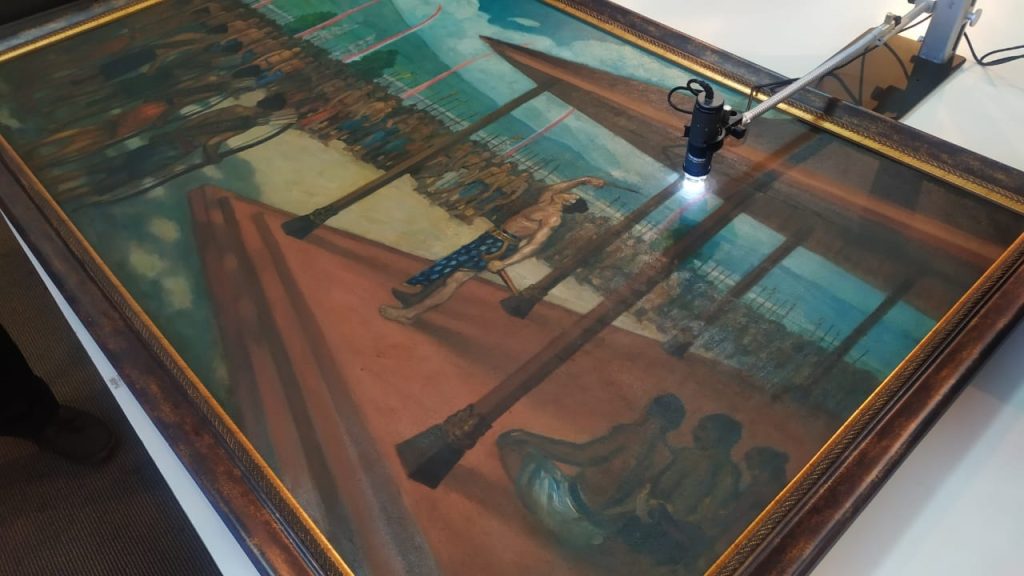
Art restoration and conservation are processes that need to be carried out very carefully. Art restorers typically need to clean the art objects carefully so as not to damage the original paint coat. They must differentiate between dirt, excess paint, and the original paint layer. They would also need to determine the authenticity of the items by looking at their structure. With microscopes that can magnify items at 200x magnification, Dino-Lite can help visually analyze the different materials used to produce the art in detail.
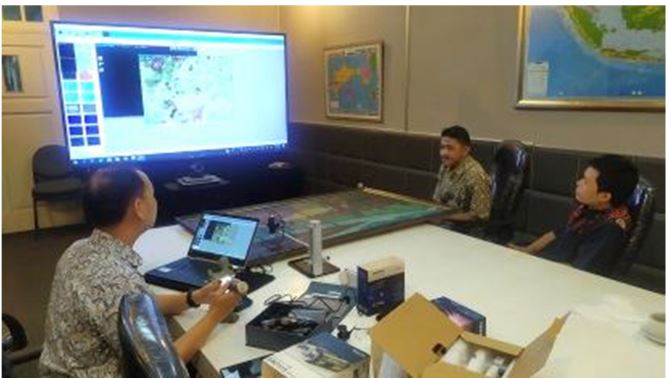
Dino-Lite checks a painting and projects it on a wide TV screen.
The user will also find the Dino-Lite USB microscope’s ability to capture images and videos, which can be annotated and beneficial for documenting historical art objects. The user could also select the medium they wish to view the art from. Dino-Lite digital microscopes can display images on TV screens, PC monitors, laptops, and Android devices. Art professionals can easily observe the work without any contact with the microscope’s ability to view items at a distance with the extended working distance models of Dino-Lite.
Some might argue that without digital microscopes, conservators in the field can still turn to handheld loupes for analysis. However, the magnification powers of such loupes can only go up to about 30x. The samples viewed will still need to be taken to a laboratory for analysis. At the same time, the Dino-Lite USB microscope offers magnification of up to 250x. Analysis can be done immediately when you are on the field. In the case of stone conservators, after looking at the stone with the Dino-Lite digital microscope, they can take samples, for example, of each kind of biological growth and bring them back to the lab for further analysis. The information can then be used to decide treatment plans for the long-term care and conservation of the stone monuments and buildings.
The Dino-Lite digital microscopes have repeatedly proven to be cost-effective tools. Coupled with the free DinoCapture 2.0 software, they will significantly help speed up the analytical process in conservation studies of many different types of materials.
References
1. Nichols, E. (2016, December 14). Under the microscope – preliminary investigations of the Changi Archive conservation research project. Retrieved April 14, 2021, from https://specialcollections-blog.lib.cam.ac.uk/?p=13554
2. Lee, C. (2020, November 02). Conservation tools: The USB digital microscope. Retrieved April 14, 2021, from https://blogs.getty.edu/iris/conservation-tools-the-usb-digital-microscope/
Uses of Dino-lite Digital Microscope for Ophthalmology
Ophthalmology

Ophthalmology is the field of medicine that deals with the anatomy, functions, and diseases of the eye. This includes the diagnosis and treatment of disorders of the eye. An ophthalmologist is a physician who specializes in ophthalmology. The credentials include a degree in medicine, followed by an additional four to five years of residency training in ophthalmology. Residency training programs for ophthalmology may require a one-year internship with training in internal medicine, pediatrics, or general surgery. Additional specialty training (or fellowship) may be sought in a particular aspect of eye pathology. Ophthalmologists are allowed to prescribe medications to treat eye diseases, implement laser therapy, and perform surgery when needed. Ophthalmologists may participate in academic research on the diagnosis and treatment of eye disorders.
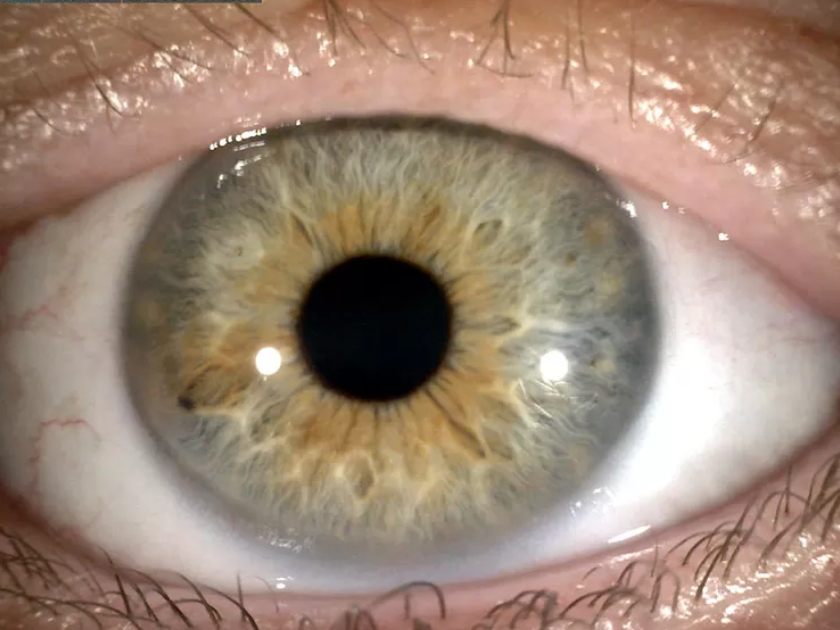
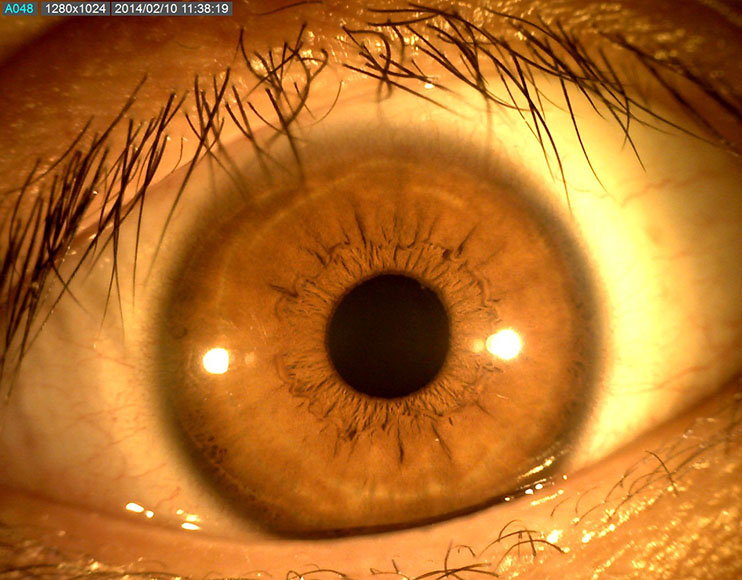
Improved View
Dino-Lite digital microscopes can help ophthalmologists when you are doing iris examinations. The AM4113-RUT is one of the many models by Dino-Lite that is suitable for such work. It is a USB microscope which is used by connecting it to a computer. The main benefit of using digital microscopes is improved view. As a user, you would be able to examine the iris through a large screen monitor instead of hunching over patients. Ophthalmologists typically must hunch to get a close examination of the patients’ iris through oculars. The AM4113-RUT enables you to sit comfortably throughout the day as you are examining patients one after another. Extended periods of bending over oculars to examine multiple patients in a day may create a cumulative strain on your back. Over time, it can be damaging to your back and cervical spine. The traditional approach takes a lot of wear and tear on your bodies. Studies show that between 30% and 50% of ophthalmologist end up with cervical neck pain or herniated discs due to the way you must position your bodies to view the eye with a traditional microscope.

Ease of Use
The AM4113-RUT is easy to use. It is very much like the other Dino-Lite models where you merely use a single scroll to magnify and focus all at once. Your movements and hand placement may be different than using oculars. Most ophthalmologists are used to resting your head against the microscope as you look through the oculars. With the AM4113-RUT, you would no longer need to rest your head against the oculars of the microscope. It is a minor change that one can easily adapt to. Rest assured that the learning curve of using such a digital microscope is not steep. As a user, you would not require a long time to get accustomed to the Dino-Lite as it is as simple as viewing an image on the screen.
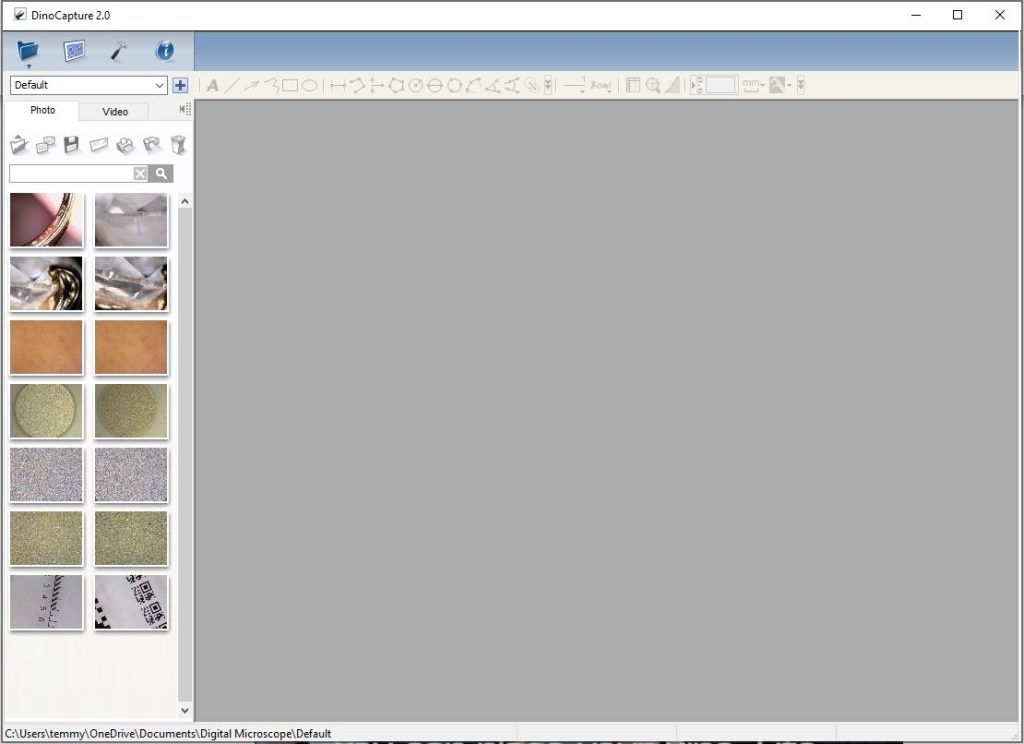
Data Collection
USB models of Dino-Lite digital microscopes are used with the DinoCapture 2.0 software. The application exists to support ease of documentation of your iris examination. You would be able to take pictures or videos by using the MicroTouch function. On the AM4113-RUT, there is a touch sensitive trigger for taking pictures and videos. Upon a single click, a picture is taken and automatically saved on your computer. All recent videos and images taken can be viewed on the left-hand bar of the DinoCapture 2.0 software. You can view the information seamlessly without interruptions during the examination. This is also a neat software for organizing and filing of patients’ iris examination images. It is easy to transfer images and videos from the DinoCapture 2.0 as they are saved to a designated folder in your computer. As you begin to use the digital microscope, you can get used to taking advantage of its capabilities. You will find an increase in efficiency as a benefit upon switching to the digital microscope. It will also greatly help you if you are seeking to file data in a “paperless” manner.
Communal Viewing
Anyone in the examination room — assistants, technicians, medical students — can watch the examinations on a monitor. As a result, it will help them to understand the patients’ situation better. If we compare it to the use oculars for examinations, only the person viewing through the microscope can get the complete picture. The others in the room will not be able to look at a monitor. The ability to see exactly what the doctor is seeing is an incredible advantage for teamwork overall. Everyone can better anticipate what is happening during the examination. Further, it also serves as a tool for resident education, fellow education, and medical student education because everyone is seeing the same thing at the same time.
Increased Safety
In the COVID-19 pandemic, digital microscopes offer an additional barrier of safety for doctors and patients. Being able to examine patients through the monitors, and not through the oculars, allows the ophthalmologist to wear a full-face shield. There is a great safety advantage to having the ability to sit back and not hover directly over the patient’s face during examination. The ability to cover your face and eyes with a face shield is an important layer of protection, for both patients and doctors amid the pandemic. Information captured is also directly saved into the computer. You would not need to handle information on written copies. You would be able to access the images again by going through them in the computer. As a result, you would be less prone to error. Data that is captured goes straight from the digital microscope directly to the computer. It increases efficiency and is better for patient safety. When examining multiple patients, you would want to do it with as little room for error as possible. Digital microscopes close that gap quite a bit.
Uses of Dino-lite Digital Microscope for Nail Capillary
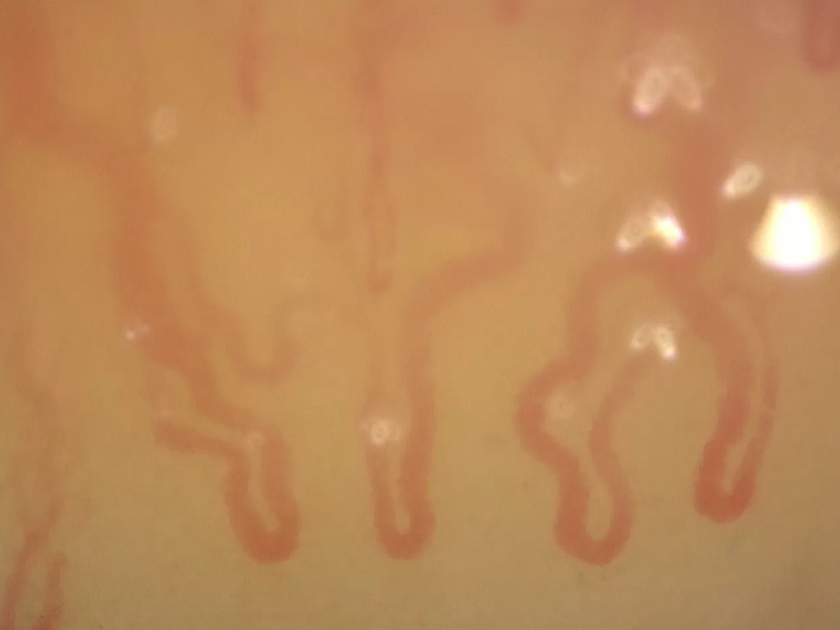
Nail Capillary
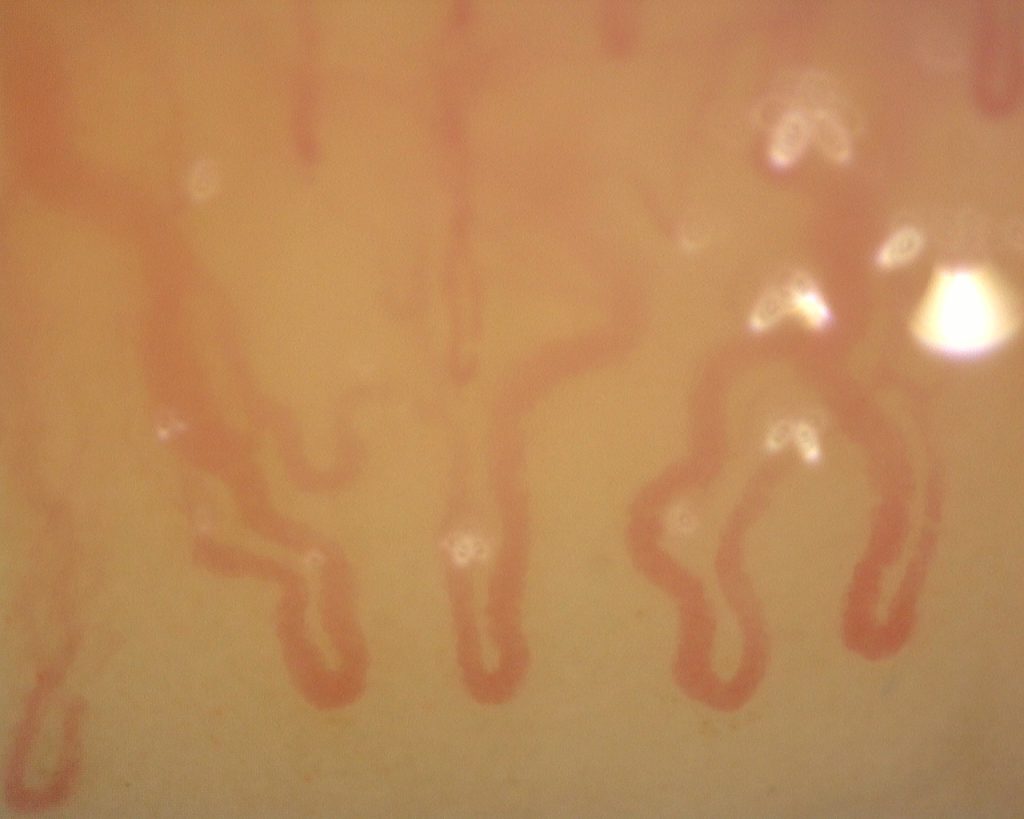
A capillary is a small blood vessel from 5-10 micrometres in diameter. They are the smallest blood vessels in the body: they convey blood between the arterioles and venules. Physician could diagnose various kinds pf disease by checking up the nail capillary.
Dino-Lite Nail Microcirculation Scope has a magnification of 500x and can examine the capillary with magnified clarity and digitally record the image for diagnostic and other purposes.
